Trey and I have been (slowly) fixing up our home office these past
six months. I'm excited that, for the most part, we're done (!!!!!), and
I'll be sharing a full room tour later this week. The room is an extra
bedroom, so it had a closet that I wanted to convert into an extra
storage area but that wasn't a total eye sore. This closet used to have a
sliding door on it, but the door got damaged and I never had it
repaired as I'm not a huge fan of the look of those doors anyway.
I knew in order to keep this area looking tidy but still functional
the easiest solution would be to add a curtain to hide the random (but
needed) contents of the closet. We store everything from our important
documents file folder to guitar cases to old brides maid dresses in
there.
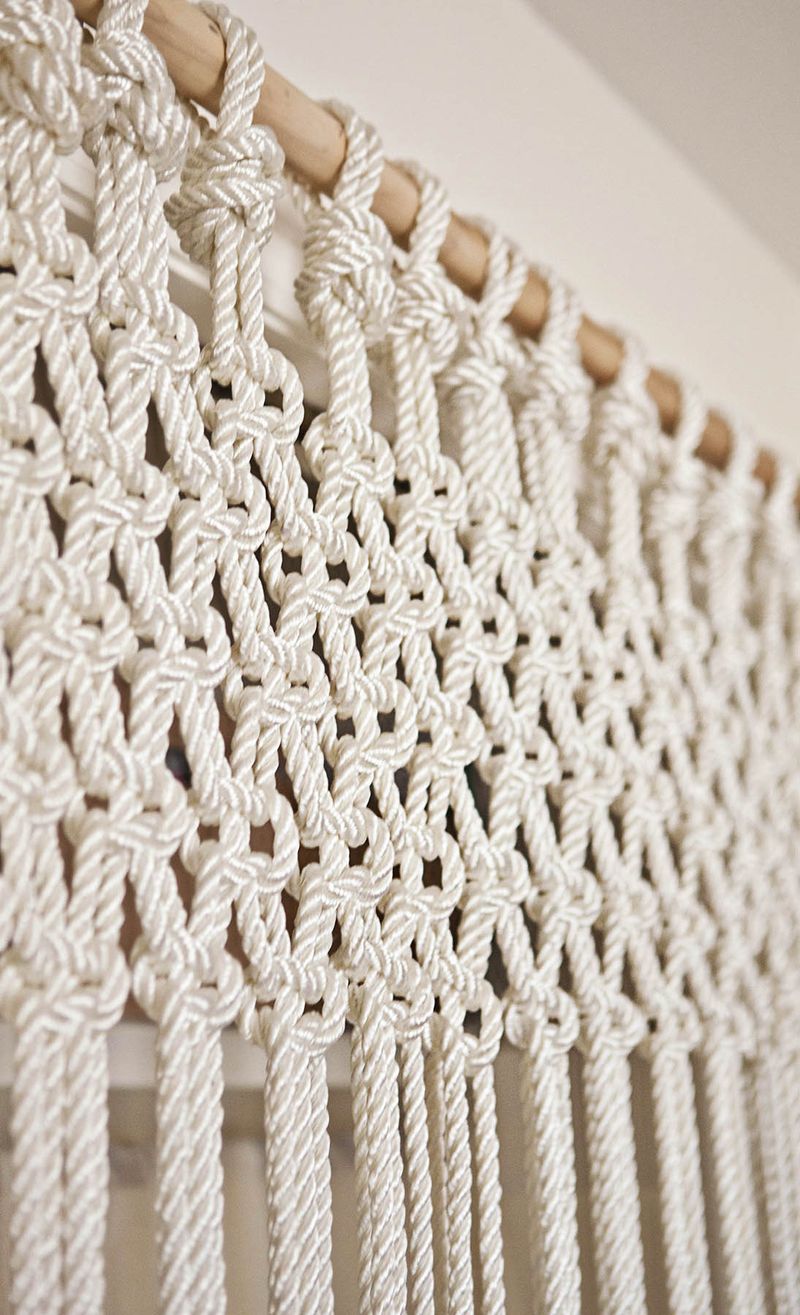
I wanted to add a curtain that was light in color (white or cream) but
that wasn't boring and would still had interest and texture to that
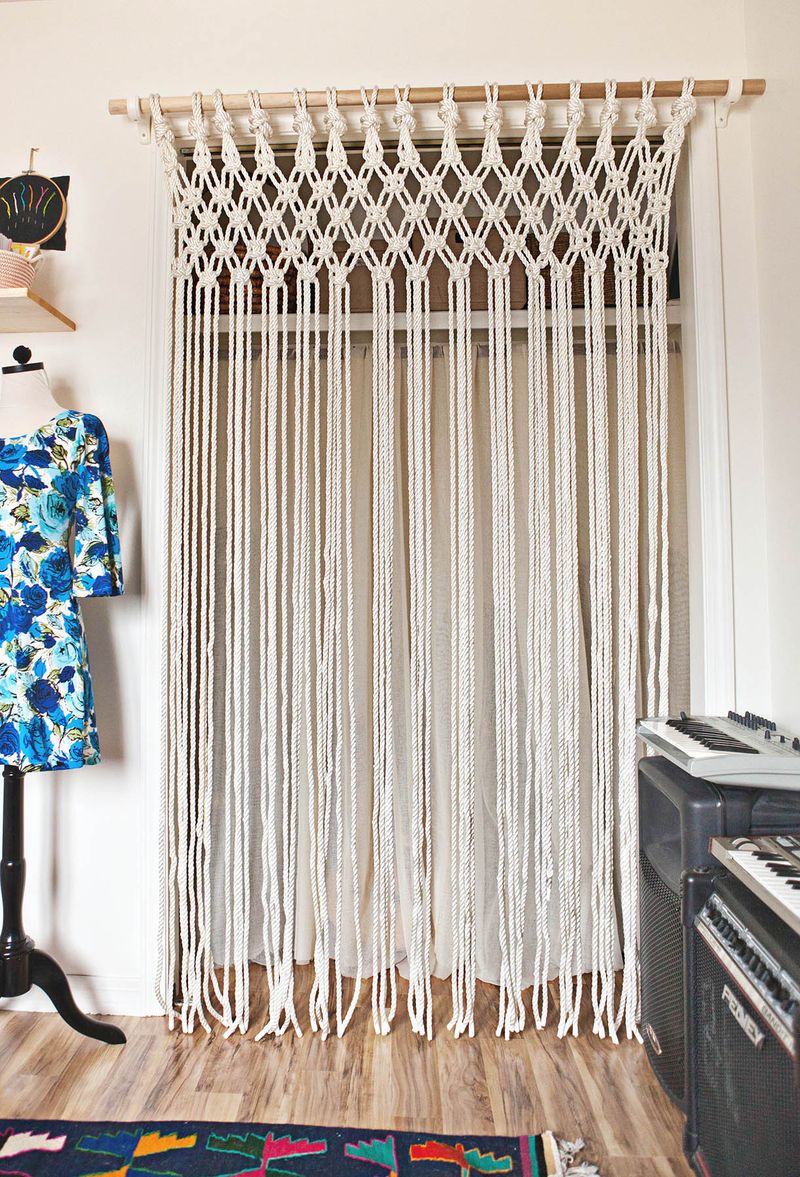
corner of the room. We decided to create a macrame curtain from thin
ropes. Here's how we made it, we used colorful yarn to illustrate the
process better:
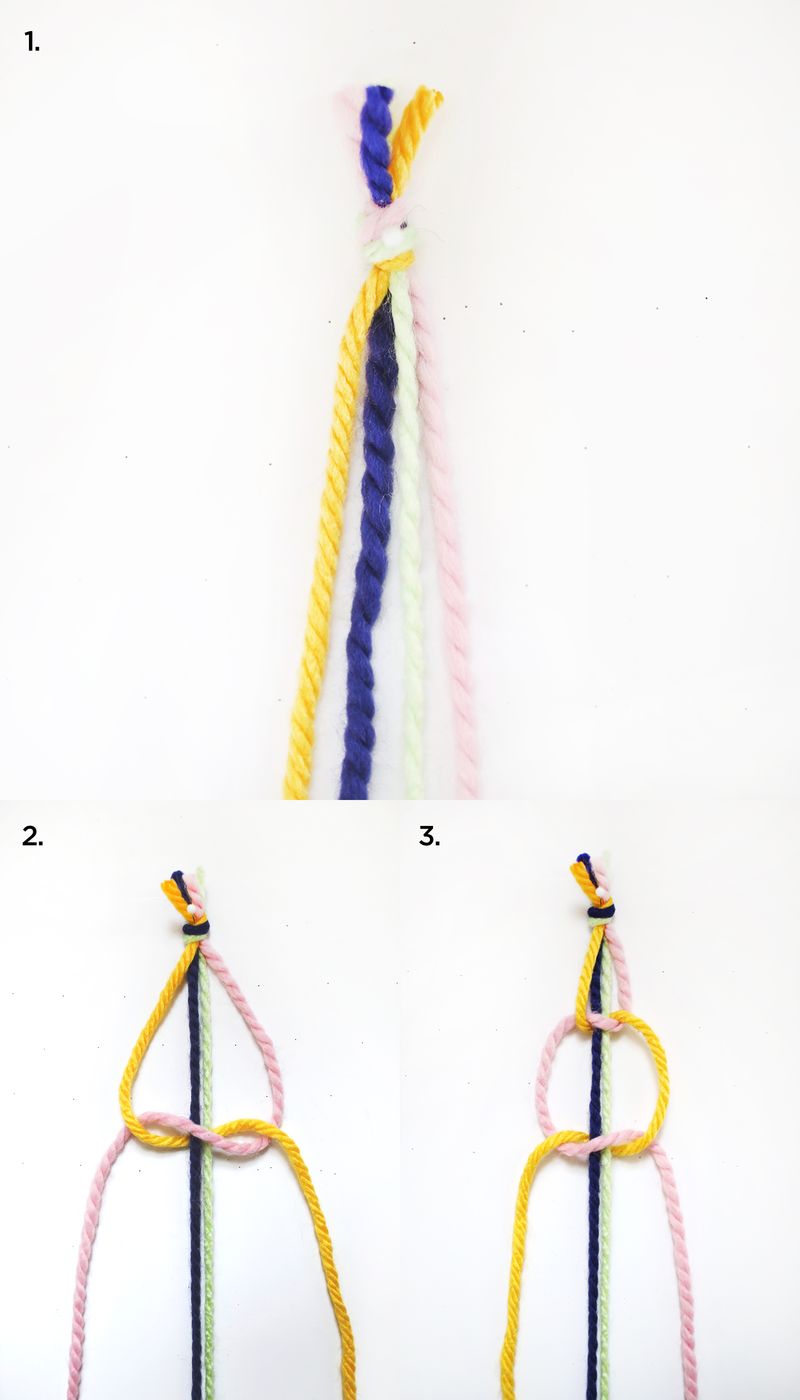
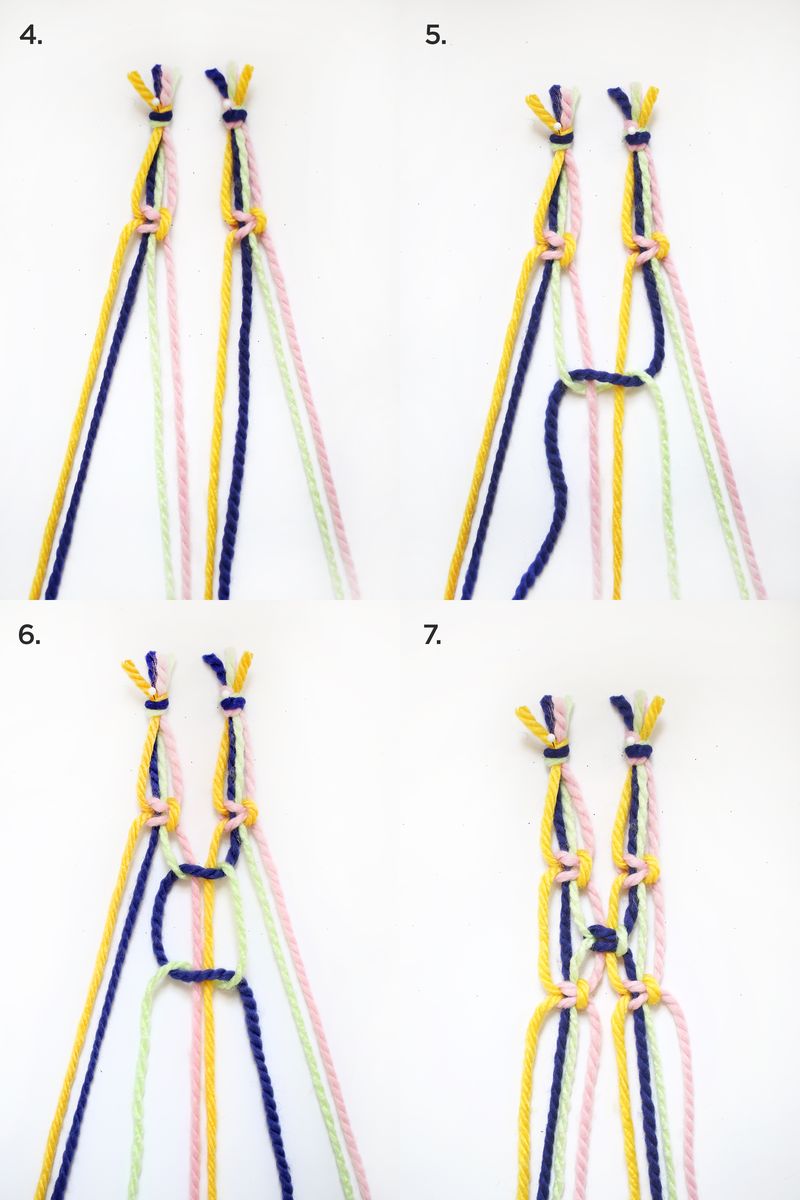
1. Tie four strands together on a foam core board and put pins into the
top knot and at the bottom of the two middle strands to keep those in
place. 2. Take the outer right strand (pink) and pass it to the left
side over the other middle two strands. Take the outer left strand
(yellow) and pass it underneath the pink strand, behind the middle
strands, and over the pink strand on the other side. 3. Pull the two
strands tight. Now you just reverse what you did in the first step! Take
the outermost left strand (which is now the pink) and lay it across the
middle two strands. Take the outermost right strand (which is now the
yellow) and pass it underneath the pink, behind the two middle strands,
and over the pink on the other side. Pull these two strands tight until
they make a knot with the woven strands from the previous step. That's
the hardest part! The rest of the steps just repeat these basic
motions.
4. Repeat steps 1-3 with four more strands to make another knot right
next to your first knot. Bring the two rightmost strands of the first
knot to make a new group with the leftmost two strands of the second
knot. 5. Repeat your basic knot with the new group by taking the outer
right strand (purple) and passing it to the left side over the middle
two strands. Take the outer left strand (green) and pass it underneath
the purple strand, behind the middle strands, and over the purple strand
on the other side. 6. Pull the two strands tight. Now reverse the first
step! Take the outermost left strand (which is now the purple) and lay
it across the middle two strands. Take the outermost right strand (which
is now the green) and pass it underneath the purple, behind the two
middle strands, and over the purple on the other side. Pull these two
strands tight. 7. Divide the middle group of strands by moving the two
leftmost strands left and the two rightmost strands right. Repeat the
basic knot with both the groups and continue this process until you have
done as many rows as you would like.
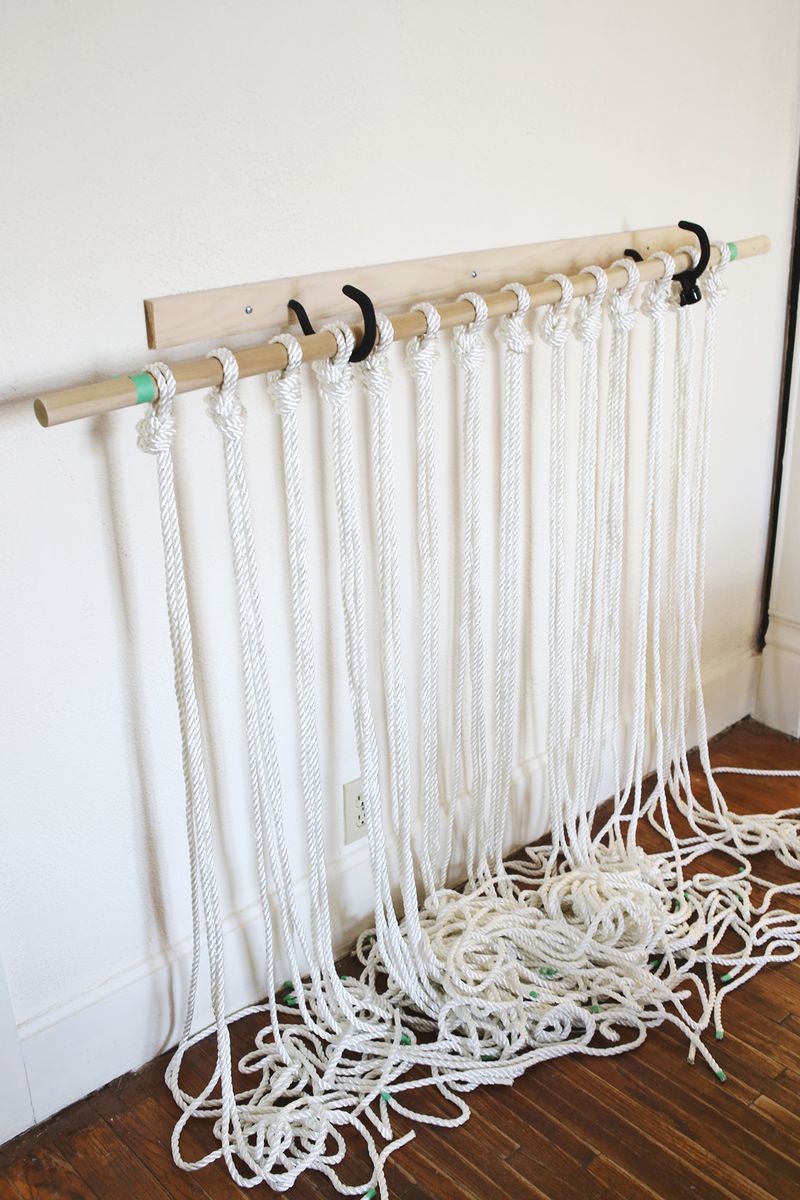
When beginning to make the actual curtain, I made 14 groups of rope,
each group with four strands that were all 100 inches long. I found it
made a neater knot at the top of the curtain to cut two strands of rope
that were twice the needed length (so 200 inches) and then I hung the
strands over the rod at the middle point and tied a knot to create a
four strand group. Since doing this process with big ropes is a much
bigger scale than the yarn, you'll have to find something to hang your
rod from so you let your rope hang beneath it (we used a bike rack to
hang ours).
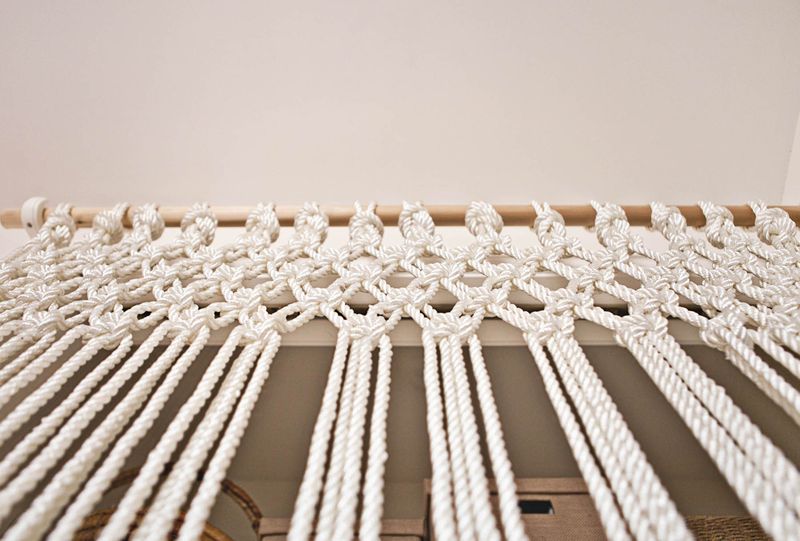
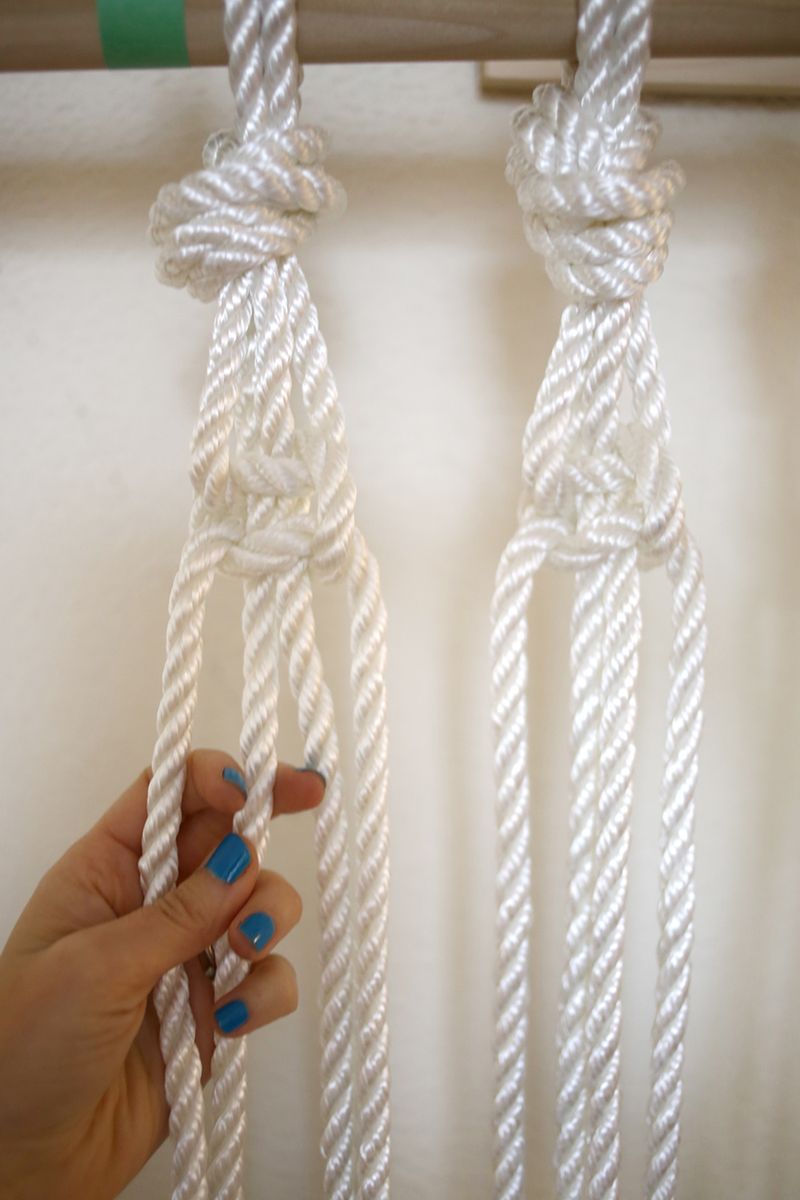
You can see that it's really the same principle of making the basic
knots in the steps with the yarn, but just on a much bigger scale. I
just made the basic knot near the top of all the 14 groups and then made
another row of knots beneath and between those knots (like in the yarn
instructions). Then I moved down another row and made knots underneath
the original knots and just kept alternating the rows of knots until I
had done as many rows as needed. Make sure to keep stepping back as you
make your knots to ensure that you are tying your knots into even rows. I
kept a ruler handy so I could measure the distance between each knot in
a row and the wooden curtain rod to make sure they would turn out even.
Once I did five rows of even knots, I let the rest of the strands hang
down to complete the curtain.
Once you finish braiding the ropes hang your new curtain in your desired
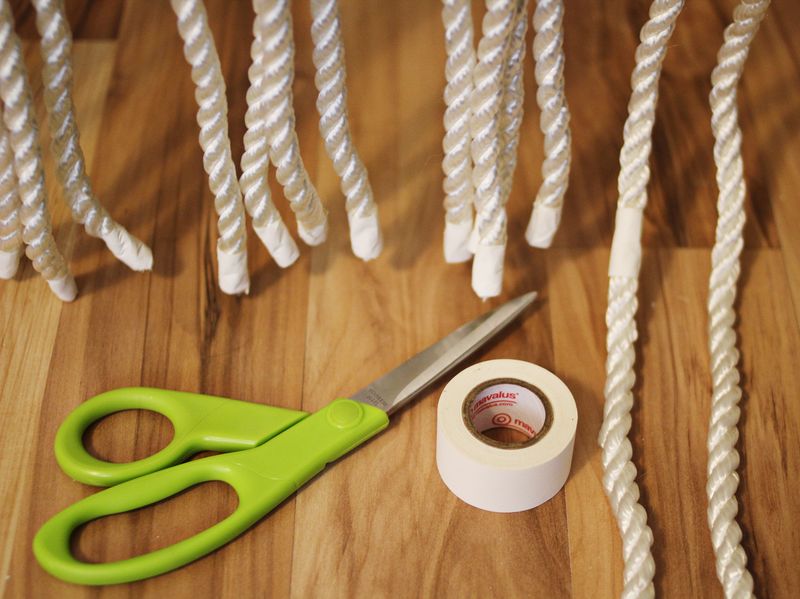
spot. To finish, wrap masking tape (or other white tape, I used "dorm
tape") around the ends right where the rope hits the floor (my curtain
is 6 1/2 feet tall). Cut through the tape, leaving 2/3 to half of the
tape intact on the rope. This will help the ends to keep from fraying
overtime.
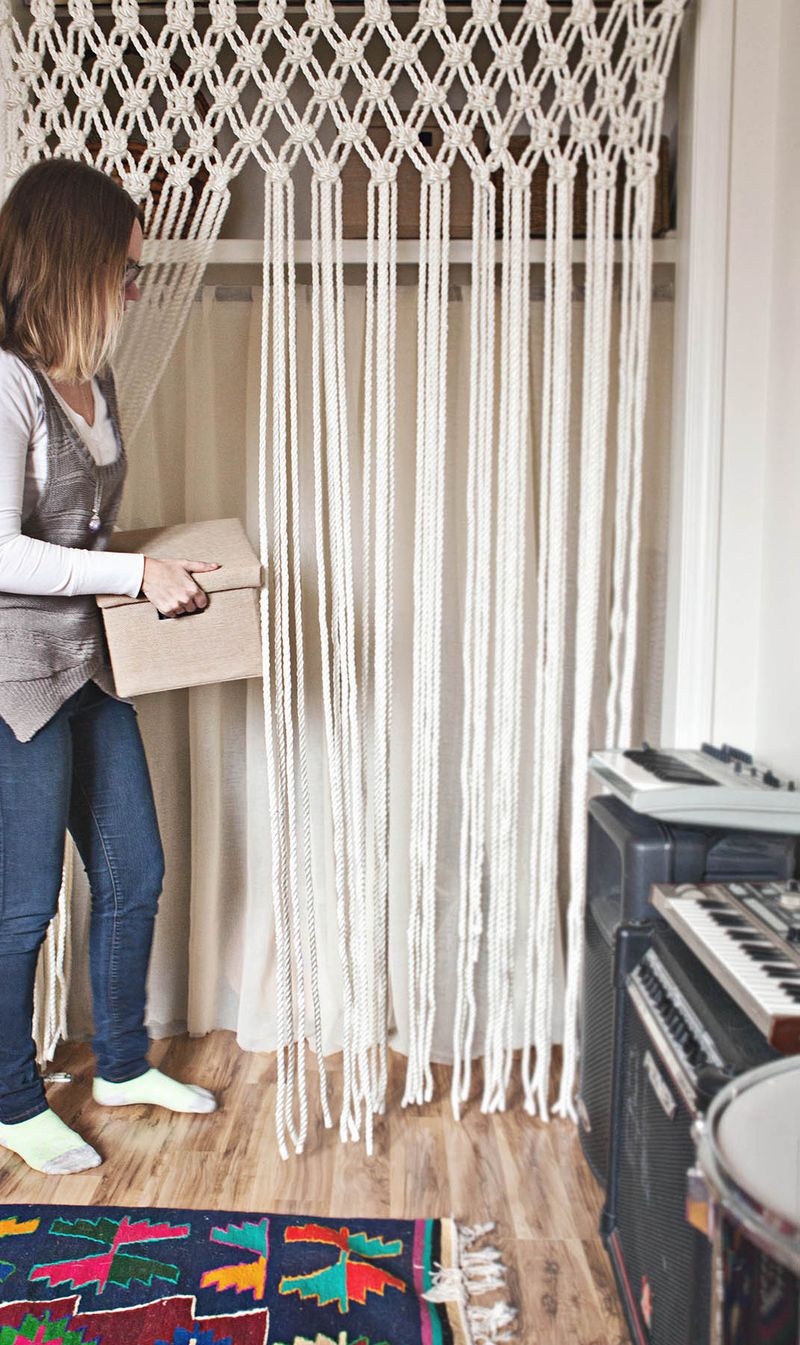
I also hung an off white long piece of fabric behind on the macrame
curtain (on the existing clothing rack). I love how the curtain turned
out! It feels different but still functional and not overly loud. We
have a very loud rug in the room (you'll see more later this week) so we
didn't need something with tons of color or that took up a lot of
attention.
This was somewhat inspired by the ACE Hotel in Palm Springs (see a photo of it here). Happy macrame days! xo. Emma
Credits: http://www.abeautifulmess.com


No comments:
Post a Comment